


If you’ve ever had the privilege of standing before an awe-inspiring natural landscape, your first instinct was probably to reach for your camera. That sheer wonder, paired with a fascination for light, is the heart of landscape photography.
Definition and Significance of Landscape Photography
Landscape photography, by definition, is the art of capturing pictures of nature and the outdoors in a way that brings your viewer into the scene. But beyond this rudimentary definition, it differs dramatically from person to person. For some, it’s purely about recording a memory, and for others, it’s a creative expression that’s part of their artistic voice. No matter the motive, its significance can’t be denied as it brings the stunning beauty and power of nature into palpable perception.
Importance of Improving Landscape Photography Skills
Though a landscape photo might seem quite simple, it’s often the result of careful planning, creative vision, and technical mastery. Enhancing these skills is essential because mastery of landscape photography can turn what’s mundane into an inspiring and compelling visual story. By improving your landscape photography skills, you can take stock photos that stand out, captivate your audience, and successfully tell the story that the landscape holds within its depths. You might even discover a newfound passion for immortalizing the world’s untouched beauty. So, let’s discover the top techniques that will elevate your landscape photography to new heights!
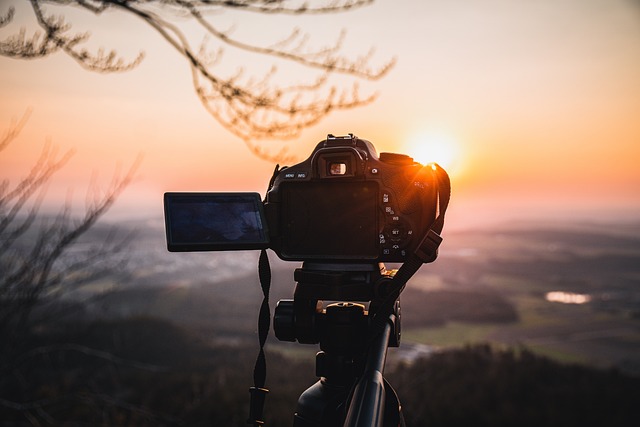
Understanding Your Gear
Your gear plays an integral role in the quality of your landscape photographs. By getting to know your camera, lenses, and accessories, you can significantly improve your skills.
Choosing the right camera and lenses for landscape photography
With a vast number of cameras available on the market, choosing one can be overwhelming. If you’re a beginner, a simple DSLR or mirrorless camera can be the perfect starting point. Once you’re familiar with manual controls, upgrade to a full-frame camera for better image quality and better control of depth-of-field. For lenses, a wide-angle lens is usually preferred for capturing vast landscapes. Alternatively, a telephoto lens can be used to focus on specific elements of the scenery creating an artistic effect.
Utilizing a tripod and filters for enhanced results
A sturdy tripod can be your best friend in landscape photography. It allows for stable shots, perfect compositions, and long-exposure photography. Filters can also be helpful. A polarizing filter, for instance, can enhance color saturation and contrast, while neutral density filters give you control over exposure time, enabling you to capture beautiful motion blur effects in waterfalls or clouds. Remember the mantra: understand your gear, harness its potential, and improve your landscape photography skills.
Mastering Exposure
Getting perfect exposure is often the key to breathtaking landscape photography. Mastering exposure can truly elevate your skills and make your photos stand out among the rest.
Understanding the Exposure Triangle (ISO, Aperture, and Shutter Speed)
The fundamental elements of the exposure triangle are ISO, aperture, and shutter speed. These three parameters work together to control the amount of light that reaches your camera’s sensor:
– ISO: This is the camera’s sensitivity to light. Higher ISO levels allow more light but can cause noise in the image. It’s best to keep the ISO as low as possible for clear, noise-free photos.
– Aperture: This determines how much light gets through the lens by its opening. A smaller f-number means a wider aperture, hence more light. But remember, a wider aperture decreases the depth of field, meaning less of your image will be in sharp focus.
– Shutter Speed: This is the amount of time your camera’s shutter is open. Slower shutter speeds let in more light but can blur motion, while faster speeds freeze motion but let in less light.
Utilizing Exposure Bracketing for Capturing a Wide Dynamic Range
Landscape scenes often have a wide dynamic range, from bright skies to dark shadows on the ground. Exposure bracketing can be your secret weapon here. This technique involves taking multiple shots of the same scene at different exposure settings. These images are later merged in post-processing software, creating a final image with a much broader dynamic range than what your camera can capture in a single shot. Master this technique and you’ll end up with a landscape picture that’s perfectly exposed from foreground to horizon.
Composing Your Shot
The art of landscape photography starts significantly with how you compose your shot. Here are two essential principles that can take your landscape shots to the next level.
Rule of Thirds and the Golden Ratio
Mastering the Rule of Thirds and the Golden Ratio can dramatically improve the composition and balance of your landscape photography. Divide your image into nine equal squares or rectangles like a tic-tac-toe board, and then place the focus of your photo at the intersections of these lines. The Golden Ratio, which is approximately 1.618, breaks your image into a grid that allows you to create a natural flow within your image.
• Rule of Thirds encourages eye movement and creates dynamism.
• The Golden Ratio supports a natural and organic composition of the scene.
Leading Lines and Framing Techniques
The next layer of powerful composition is to master leading lines and framing techniques. Use natural elements within the scene, such as rivers, roads, or a row of trees, to create ‘leading lines’ that guide the viewer’s eye toward the focal point of your image. Framing your subject using elements within the landscape like arches or lake reflections can help draw attention to the central point.
• Leading lines add depth, dimension, and grandeur to the photograph.
• Framing, when used appropriately, provides structure and focus to the main subject.
From these techniques, you can see that composition plays an integral role in your landscape photography. It’s an area where you can truly let your creativity shine.
Utilizing Natural Lighting
Capturing the breathtaking charm of natural landscapes demands more than just a camera. It requires understanding and harnessing the magical power of natural lighting.
Importance of Golden Hour and Blue Hour
The “Golden Hour” and “Blue Hour” hold paramount importance in landscape photography. Often referred to as the photographers’ hours, these specific timeframes during the dawn and dusk provide strikingly soft, diffused light enhancing the landscape’s colors and textures.
• The Golden Hour: This occurs shortly after sunrise or before sunset when the sunlight is warmer and softer.
• The Blue Hour: This precious moment happens both before sunrise and after sunset. It’s particularly noted for its deep blue sky and cool, even tones.
Working with Different Types of Lighting Conditions
Every light condition brings a unique touch to your photos. From vibrant sunsets, ethereal foggy mornings, cloudy mid-days, to harsh noon light, each comes with its challenges and opportunities to create striking images. By learning how to work with varied lighting conditions, you can transform seemingly mundane scenes into intriguing stock photos. To capitalize on this, consider:
• Differentiating Frontlight, Backlight, and Sidelight situations
• Shooting in Raw to gain the advantage of better optimizing your highlights and shadows during post-processing.
Remember, stunning landscape photography is not only about the right equipment but leveraging the natural lighting conditions.
Creating Depth and Perspective
One of the main things that distinguishes an amateur’s photos from a professional’s is the effective use of depth and perspective. If you master these two concepts, you can significantly transform your landscape photography.
Utilizing foreground interest to create depth
The foreground is the first part of the frame that catches the viewer’s eye, and using it creatively can add depth to your photos. This technique immerses the viewer into the scene, drawing them in from the front and guiding their eyes towards the main subject or background. Some interesting foreground elements could be:
– Natural objects like flowers, rocks, or trees.
– Man-made structures like fences, roads, or buildings.
Working with different focal lengths for varied perspectives
Experimenting with different focal lengths can also generate interesting perspectives. Wide-angle lenses (24mm or less) usually accentuate the depth and create a vast sense of space. On the other hand, telephoto lenses (70mm or higher) can flatten the scene but can offer detailed shots of far-off subjects. Here are some quick tips:
– Use wide-angle lenses to encompass more of the scene.
– Use telephoto lenses for a compressed perspective or intimate landscapes.
Understanding and Utilizing Composition Techniques
Mastering composition techniques is vital in landscape photography. It helps to create visual balance in your photos, attracting viewers to your image, and guiding them through the scene.
Rule of Thirds and the Golden Ratio
The Rule of Thirds and the Golden Ratio are quintessential aids in achieving a well-balanced photograph. These techniques instruct us to align the key elements of the landscape along imaginary lines or intersections in the frame.
• Rule of Thirds: Imagine your frame divided into nine equal parts by two horizontal and two vertical lines. The theory posits that if you place points of interest on these lines or at their intersections, your photo becomes more engaging.
• Golden Ratio: This is a slightly more complex version, but it works similarly to the rule of thirds, providing a natural feeling of depth and balance.
Using Symmetry and Patterns
Our eyes are naturally attracted to symmetry and patterns. In landscape photography, reflections on calm lakes, rows of trees, or mountain ranges can be used to create fascinating patterns or symmetrical compositions that captivate viewers.
Incorporating Foreground, Midground, and Background Elements
Landscape photos should not just be about distant vistas. It’s crucial to include elements at various depths to instill a sense of depth. A captivating foreground subject can guide the viewer’s eye towards the midground and, finally, the majestic background, thus creating an immersive three-dimensional feel in a two-dimensional image.
Capturing Movement in Landscapes
Capturing movement in your landscape photographs is a crucial technique that adds a dynamic and captivating effect. This technique will enable your photos to tell a story, adding an extra layer of depth and dimension.
Using Long Exposure to Create Smooth Water and Cloud Effects
Long-exposure photography is one perfect technique to bring out this sense of movement within a tranquil setting. If you’re photographing a body of water or skyscrapers, using long exposure can help you achieve that surreal, smooth effect. It’s as though time has coalesced into a single frame.
– Use a Neutral Density (ND) filter to control the amount of light entering the lens.
– Keep the shutter open for a longer period to softly blur the cloud or water movements.
Freezing Motion in Landscapes for Dynamic Shots
On the other hand, freezing motion in your landscape pictures creates a dynamic and active vibe. Here, you simply use a fast shutter speed to capture details crisply and without blur.
– Fast-moving elements like birds in flight or crashing waves make great subjects for this technique.
– Remember, proper timing is key to perfecting this technique.
These techniques will infuse life into your still images and make them more captivating to your viewers.
Post-Processing Tips
Post-processing is a critical final touch to your landscape photography – an opportunity to put your stamp of creativity and enliven the captured scenery.
Selecting the Right Software for Post-Processing
Several excellent tools are available for this purpose, such as Adobe Lightroom, Photoshop, and DxO PhotoLab. The key is to find a program that provides sophisticated options, works within your budget, and most importantly, feels intuitive for your workflow.
- Adobe Lightroom: Well-equipped for all-around photo editing
- Photoshop: Advanced tool with finer control
- DxO Photolab: Renowned for its superior noise reduction
Enhancing Colors, Contrast, and Sharpness
The next stage is to elevate the colors, contrast, and sharpness in your photos. Pay close attention to natural elements – the vibrancy of greenery, the depth of the sky’s blue, and the rugged texture of rocks and mountains.
Adjusting contrast helps portray the depth and dimensionality of the scene, and fine-tuning sharpness can elevate the level of detail in your image.
Utilizing Selective Adjustments for Targeted Improvements
Selective adjustments, such as radial, gradient, and brush tools, can apply changes to specific areas, providing granular control over your edits. For instance, you could lighten a shaded area without overexposing the photo, or enhance the color in the sunset while maintaining the tone of the rest scene.
In essence, post-processing is your opportunity to turn a good stock photo into an extraordinary one.
Learning from the Masters
One of the most influential ways to enhance your landscape photography skills can be by analyzing the work of prominent landscape photographers. By closely examining their compositions, use of light, and the ways they capture their subjects, you gain a greater understanding of what may be achieved.
When you study their work, look for the following:
– The viewpoint: Where was the image shot from?
– Use of light: What role does lighting play in the photo?
– Composition: How have they arranged the elements in the frame?
Implementing their Techniques and Styles in Your Photography
Once you’ve dissected the master’s techniques, it’s time to incorporate them into your work. This isn’t about replicating their photos, but employing their philosophy and tactics to capture your unique perspectives. Consider trying a new angle, manipulating light differently, or perhaps challenging yourself to change your go-to composition style. As you gain practical experience implementing these techniques, you’ll find your style evolving and your skills in landscape photography improving. Remember, practice makes perfect!
Conclusion
As we come to the end of our photographic journey, it is time to take a moment to revisit the top 10 techniques we covered to improve your landscape photography skills.
Recap of the top 10 techniques to improve landscape photography skills
Here’s a recap in brief:
- Focusing on composition
- Incorporating leading lines
- Using the right light
- Applying the rule of thirds
- Experimenting with different exposures
- Emphasizing natural elements
- Paying attention to details
- Capturing movement
- Taking advantage of the golden hour
- And last but not least, the proper use of filters for the appropriate mood and depth.
Encouragement to practice and experiment with these techniques to unleash creativity
These techniques are not set in stone, but rather, are guidelines to help enhance your perspective and abilities. As with all creative pursuits, the magic lives within the experimentation. So, feel free to mix and match, twist, and turn these methods until they shape into something that is uniquely yours. Don’t be afraid to go against the grain and innovate with these techniques. Ultimately, this exploration of the unknown is where your creative prowess will thrive. So, go out there, immerse yourself in nature’s beauty, and let your landscape photographs tell the captivating stories that only you can narrate. Happy Shooting!
Related Post: